
Sub-Total: ₱0.00
As their spine curve at an angle, a scoliotic person not only deals with the physical discomfort and pain, but this also affects the person’s self-esteem. There’s lack of understanding about the physical deformation and people tend to be cruel against those who are different. People who claim to have normal spines might even see people with scoliosis as someone weird, what with the bulging back, uneven shoulders and hips, or the funny way of walking.
3D printing in medical application, Helps not only the Medical professionals to understand special cases like this but also ordinary people such as children, parents, and individuals without proper knowledge in medicine.
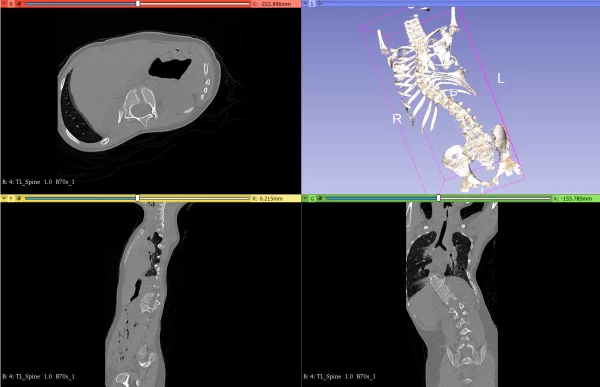
CT scans have 2D presentations that only medical practitioners can fully understand, with the aid of 3D printing, visual 2d pictures can now be tangible and help both Doctors and patients to have proper communication and understanding before proceeding to an operation.
On the side of the Doctor; the 3D printed part will serve as the practice model of the actual spine, where they can do operations such as Spinal Fusion, drilling bolts and rails to straighten the curve. Base on them, they can save a lot of time and having the higher success rate of the operation.
On the side of the Patients; with the help of a Doctor, 3D printing will help you see how the operation will undergo while you are asleep. In addition to it, it also provides you deeper understanding of your structure by feeling it.
Here are the Major steps that we do to achieve 3D printing this spine:
1. GETTING THE RAW CT SCAN FILE / DICOM FILE
The CT scan will provide you 2D images that can be turned into 3D file when you merge all the images using a software called 3D slicer. After that, you must save the 3D file in the format of “.stl” for it to be open later on the 3D printer slicer.
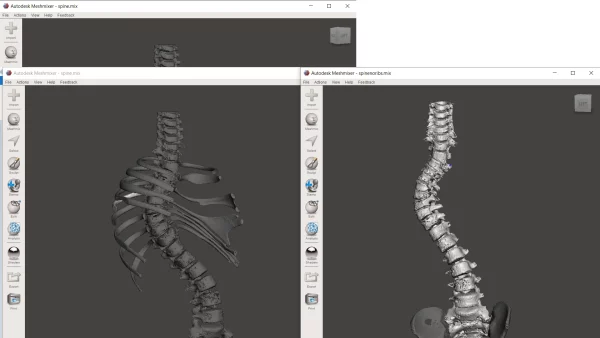
2. REMOVE ALL UNNECESSARY OBJECTS ON THE 3D FILE
Since CT scans are very accurate, it can capture even soft tissues and sometimes even veins, and other elements inside your body so you need to remove them on Autodesk Meshmixer. This software will also help you to smoothen the texture of your bones and remove the parts that you don’t need. After that export your model on “.stl” format.
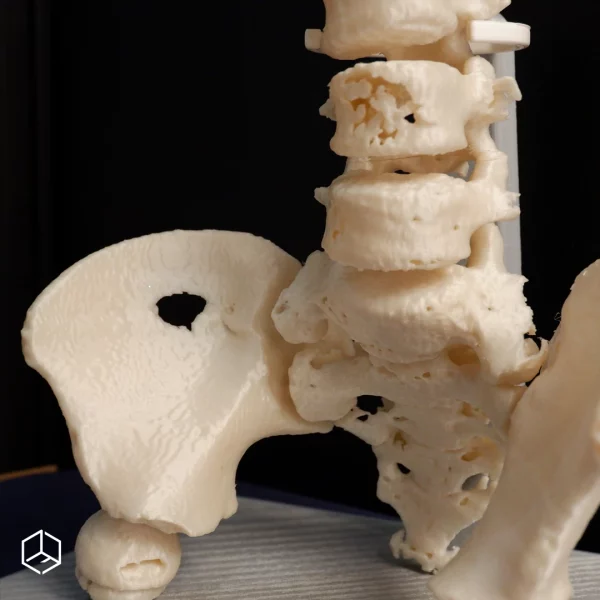
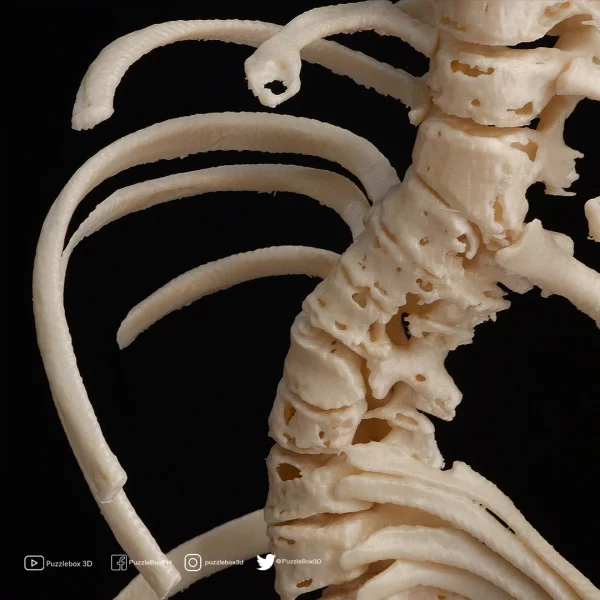
3. PRINT YOUR 3D FILE
With the help of Cura (3d printing slicer) you can prepare your 3d models here to proceed on being 3D printed by setting the proper materials and settings to it such as orientation, supports, scale and positioning. It can also tell you how long the 3D printing session will take. Save the file and print it on your 3D printer.

4. PRESENT IT TO YOUR PATIENTS/LOVED ONES
Sharing knowledge means that you care, let everyone knows the awareness, it can save lives.
Posted in Applications